Questions
- I lost power or need to reset the circuit breaker
- I lost power to the bathroom, kitchen, or outside
- Checking for a blown fuse
- How to unjam my garbage disposal
- How to properly use your garbage disposal
- What do I do if I smell gas in the house?
- How do I light pilot light on gas fireplace?
- What if I don’t have hot water?
- When and how do I change my furnace filter?
- My air conditioning is not working
- No heat for systems using electric heat
- No heat for systems using gas heat
- How do I patch a hole in a dry-wall
- How do I unclog my drain
- Troubleshooting your dishwasher
- How to turn off main water supply
- Smoke detector FAQs
- Dryer Issues?
- Washer Issues?
- Refrigerator Issues?
- Garage Door Issues?
IMPORTANT: This document is not intended for you to do your own maintenance, but an answer to many questions that many residents have asked. Some of these suggestions are simple and some are involved. If at any time you choose to safely attempt any of these and are unable to safely perform such, please submit a maintenance request through the Tenant Portal.
Answers
What if I lost power or need to reset the circuit breaker?
A circuit breaker is an automatic device for stopping the flow of current in an electric circuit as a safety measure.
A circuit breaker provides protection by stopping the flow of electricity if an overload or fault occurs. When an electrical fault occurs or the load on your circuit becomes too great, the breaker on that circuit trips and interrupts the flow of current to that circuit. A tripped circuit breaker is still sometimes referred to as a “blown fuse” in reference to the older technology that circuit breakers replaced
Before electricity can be restored, the circuit breaker must be reset. However, even before you do that, you must take steps to ensure that it is safe to do so. Turn off or unplug all of the devices that are plugged into the circuit. Make certain no dangerous condition exists before restoring power.
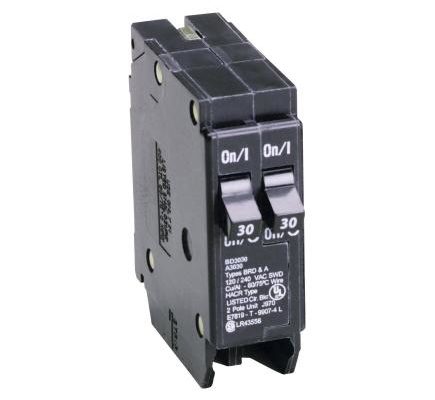 A Circuit Breaker which has been tripped will either be in the middle or “OFF” position. Locate the tripped circuit breaker and reset it by pushing it all the way to the “OFF” position and then back to the “ON” position. Often when you cannot reset the circuit breaker, it is because it must be turned all the way to the “Off” position first.
What if I lost power to the bathroom, kitchen, or outside?
A GFCI (Ground Fault Circuit Interrupter) outlet is a device that adds a greater level of safety by reducing the risk of electric shock in locations such as bathrooms, kitchens, laundry rooms and outdoors
In an effort to safeguard even more electrical installations, the 2017 NEC (National Electrical Code) has expanded requirements for GFCI-type receptacles. Since 1971, the NEC has expanded the requirements for ground-fault circuit interrupters (GFCI) to protect anyone who plugs into an electrical system. GFCI protection is required for receptacles installed in any of the following seven areas of a dwelling unit (ground-fault-and-arc-fault-circuit-interrupter-protection [210.8(A)]) – Modern dwellings should have GFCI in:
- Bathroom
- Garage
- Outside
- Crawl space (at or below grade)
- Unfinished basement
- Kitchen
- Laundry
 A GFCI (Ground Fault Circuit Interrupter) outlet, usually a duplex outlet as shown, provides electrical shock protection and prevents the risk of electrical fire caused by ground fault current. At times, outlets and electrical devices may share the same circuit and breaker (or fuse). When a properly wired GFCI trips, the other devices down the line from it will also lose power. Note that devices on the circuit that come before the GFCI are not protected and are not affected when the GFCI is tripped.
If you have an outlet that doesn’t work, and the breaker is not tripped, look for a GFCI outlet which may have tripped. The non-working outlet may be down line from a GFCI outlet. Note that the affected outlets may not be located near the GFCI outlet; they may be several rooms away or even on a different floor. Pressing the “Reset” will restore the circuit. If the outlet doesn’t reset, then whichever appliance that is causing it to trip, may still be plugged in. If after unplugging everything, checking the circuit breaker or fuse, and resetting the GFCI does not work, please submit a maintenance request to sovereignrm.com right away.
Checking for Blown Fuse

 If you have an older system, you may have fuses as opposed to circuit breakers. Located inside or outside of your home is a fuse box that contains a fuse for each of your home’s circuits. A fuse provides protection for each of your circuits. When an electrical short occurs or the load on your circuit becomes too great (overload), the fuse on that circuit burns out and breaks the circuit; this is what is referred to as a “blown fuse”. Before electricity can be restored, the fuse must be replaced with a new fuse. However, even before you replace the fuse, you must take steps to ensure that it is safe to do so:
Step 1: Turn off or unplug all of the devices that are plugged into the circuit. Make certain that no dangerous condition exists before restoring power.
Step 2: Replace the fuse with a fuse that is of the proper rating for the circuit. For instance, if the circuit is rated for 15 amps, use a 15-amp fuse. Never use anything other than a fuse of proper rating.
Step 3: When removing or inserting a new fuse, NEVER touch the metal parts of the fuse. If your fuse box is equipped with a master switch to cut power to the fuse box, cut the main power before replacing the fuse.
Step 4: Electricity should now be restored to the circuit. If the fuse blows again before you have turned anything on or plugged anything in, submit a maintenance request to sovereignrm.com right away.
If the fuse blows after plugging in or turning on a device, that device may have a short or it may be placing too much of a load on the circuit.
If no fuses were blown and you still do not have power at an outlet, make certain that the switch, if any, that controls the outlet is turned on. If you can find no problem, the outlet, switch, wiring or some other component may be at fault.
Also, the outlet may be on a GFCI branch circuit. Refer to the guide for checking a GFCI circuit.
How do I unjam or unclog my garbage disposal (food waste disposer)?
First things first, NEVER put your hand in the disposal nor pour any type of fats, oils, and grease in a garbage disposal, or down a sink drain for that matter. Those materials collect inside the plumbing pipes and are usually the cause of many plumbing issues. No needles, razors plastic or glass.
What can I put in the food waste disposer?
Steps to unjaming or unclogging the garbage disposal
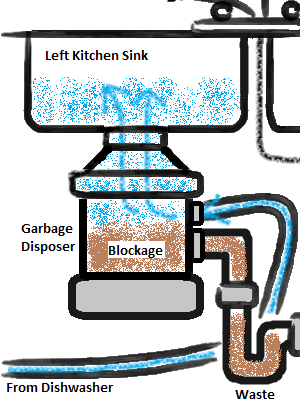 Step 1 – Basic Maintenance
- Turn off the power to the jammed disposer and unplug it.
- Look inside the opening with a flashlight to see what is jamming it.
- Remove the waste using small tongs or pliers and restore power.
- Run the water in the sink, turn the power back on, and try to run the disposer again.
Tip: If it’s a particularly difficult clog, while the power is still off, insert a broom handle into the drain opening and try to free the impellers (grinder).
Step 2 – Reset the disposer and turn the impellers (grinder)
- Turn off the power. Check the bottom of the unit; find the reset button and press it, then turn on the power to test.
- If the disposer is still stuck, turn the power back off and insert a ¼-inch Allen wrench into the hex socket on the bottom.
- The socket is connected to the impellers that crunch up the waste. Using the hex key, turn the impellers in both directions to free them up.
- Do not try to loosen any nuts or bolts inside the grinding chamber, as they hold the unit together.
- Turn the power back on and try again.
Usually there is an Allen wrench tool specifically designed for garbage disposals, insert it in the hole on the bottom of the disposal and turn it (back-and-forth) until the impellers are free.

Watch video:
How to safely use your garbage Disposal
- Make sure the disposal is not clogged – see item 4 if disposal is jammed.
- Run a steady stream of cold water into the sink before turning on the garbage disposal.
- Before placing any food waste into the disposal, turn it on first
- Ensure that waste is cut into relatively small pieces – Your garbage is only so big, and its blades and motor are built to match, so you shouldn’t expect miracles when it comes to grinding up large chunks of meat or fruit. One of the best ways to ensure your disposal’s longevity, make sure you cut your waste into smaller chunks and only feed them into your disposal a few pieces at a time. Otherwise, it is very easy to overwork your disposal and clog or jam it, or even worse, break it altogether.
- Gradually feed food waste into the disposal, avoid putting large amounts of food waste all at once as this may slow the grinding process
- Once the food waste has been broken down, run your disposal a little longer before turning it off; let water run for a few seconds to flush the drain pipe
- Grind citrus fruit – Soap and cold water can go a long way in keeping your disposal clean, but every once in a while, you can toss in the peel from an orange, lemon, or lime to help keep things fresh and clear any excess waste that may have built up in the disposal. This can also help to eliminate unpleasant odors.
What to do if I smell gas in the house?
Natural gas is a popular fuel for home and water heating. Unfortunately, if you have natural gas appliances, there’s always a small risk of a gas leak—which could cause a fire or explosion if the leaked gas comes in contact with a spark. Breathing air with high concentrations of natural gas can also cause asphyxia and possibly death.
That’s why you need to take potential gas leaks very seriously. Learn what signs to watch out for and what to do if you discover your home has a gas leak.
Rotten Egg smell
While natural gas is odorless, colorless and tasteless, utility companies add a sulfur-like odor to the gas that enters your home so you have an effective way to detect a leak. If you smell rotten eggs with no apparent source, it could mean you have a gas leak.
Other Signs of Natural Gas Leak
You shouldn’t rely solely on your nose to detect a leak. You may have a diminished sense of smell, other odors could mask the rotten egg scent, or smelling the same odor for too long could desensitize you to it. Loss of odorant in the natural gas itself could also make it more difficult to sniff out. That’s why you should watch for other signs of a natural gas leak:
- Hissing, roaring or whistling coming from a natural gas appliance
- Damaged fuel lines leading to a gas appliance
- Dead vegetation above the natural gas pipeline leading into your house
- Unusual water bubbling or soil movement on your property
- A natural gas pipeline is exposed after an earthquake, flood, fire or other disaster
What If You Think Natural Gas is Leaking?
If you smell rotten eggs or suspect a gas leak for another reason, follow these steps:
- Don’t do anything that could cause a spark. This includes flipping a light switch, unplugging electrical devices or using a phone (landline or cell).
- Put out anything currently burning. This includes snuffing out cigarettes and blowing out candles. Don’t light a match, stove, or cigarette lighter if you suspect a gas leak.
- Open windows and doors to let fresh air inside.
- Turn off the gas supply at the meter and keep it off until deemed safe to turn back on.
- Standing a safe distance away from your home, call 911 and your gas provider.
How do I light a pilot light on a gas fireplace?
Submit a work order immediately to sovereignrm.com annotating all observations about the problem.
First, if you wish to use your fireplace, read your fireplace manual. You will need to have an annual inspection and cleaning done by a certified chimney sweep.
If you have a key-type gas fireplace

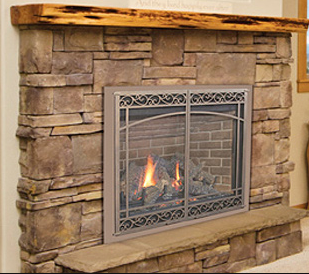 Look around the base of the fireplace and locate a small metal hole; this is the keyhole. The keyhole is usually located on the floor just in front of the fireplace, but can also be located on the lower portion of a nearby wall.
- Grasp the handle of the key, which looks like a metal rod. Insert the square end of the key into the key hole until it stops. Jiggle the key slightly until you feel it lock into place inside the keyhole.
- Turn the key counterclockwise approximately 1/2 turn to release the flow of gas into the fireplace logs.
- Insert the end of long butane lighter near the center of the gas logs where the gas tube is. Press the trigger on the lighter to produce a flame and ignite the gas logs.
- Insert the key back into the key hole to increase or decrease the height of the flame as desired. Turning the key counterclockwise increases the flame and turning it clockwise decreases the flame.
What if I don’t have hot water?
Submit a work order immediately to sovereignrm.com annotating all observations about the problem.
- Is your water gas or electric heat?
- Check that a fuse hasn’t blown or that the circuit breaker hasn’t tripped. Replace with the appropriate fuse or reset the circuit breaker.
- If the hot water is gas heated, check if the gas is on or the pilot light is out.
- Did the Gas Company shut off the gas?
When and how do I change my furnace filter?
Filter
Pollutants
Watch YouTube video: https://www.youtube.com/watch?v=-Y06YJpVZbw
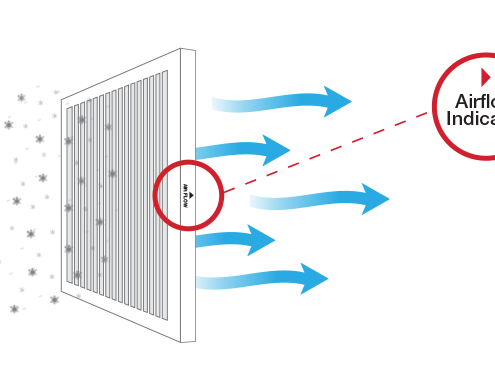
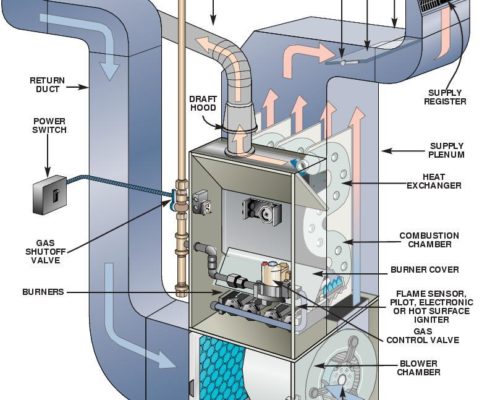
Changing your furnace filter every two – three months helps to keep your furnace running at peak efficiency, and helps to prevent pollutants from entering your living space.
Fortunately, replacing a furnace filter is a pretty simple task, once you know what you’re doing. There are ways to botch the job, however, for example by buying the wrong furnace filter or putting it in backwards, which could block the flow of air instead of cleaning it. Here’s how to do the job properly in three simple steps.
Step 1: Check that you have the correct replacement filter on-hand. Turn off the furnace.
Step 2: Remove the used furnace filter, which will be located inside the furnace or inside the return air vent. Look for an arrow on the filter indicating airflow direction. Using a permanent marker, draw the airflow direction on the outside of the furnace, so you’ll always know the right way to install the filter. Then note the furnace filter size, which will be printed on the cardboard frame.
Step 3: Install the new filter. Look for the markings that tell you which side of the filter should face the furnace. Always point the arrow towards the furnace. Then slide the filter back into place and replace any cover that goes over it.
Step 4: Keep a record of the date so that you’ll know when it’s time to change the furnace filter again. Put the next change reminder date in your calendar as well.
How do I get my air-conditioning to work? (AC is working!)
First, before calling in your problem or making a work order request, please check the below possible options:
Step 1: Check that a fuse hasn’t blown or that the circuit breaker hasn’t tripped. Replace with the appropriate fuse or reset the circuit breaker.
Step 2: Check the furnace filter. If the filter is dirty it needs to be replaced.
Step 3: Check the thermostat. Make sure the batteries are good and that temperature isn’t set too low if the inside temp is high inside.
Step 4: Check the outside unit (condenser) to see if the fan blades are moving and that the unit is not iced over.
Step 5: Some AC units have a light switch right next to the furnace which turns the furnace and AC off. Because this switch is identical to a light switch, it gets turned off by mistake. Simply check any nearby switches. If they don’t turn lights on and off, they may be turning the furnace and or AC on or off.
If after checking the above and you still do not have air conditioning, please submit an on-line maintenance request.
No heat from system using electric heat
Before calling in your problem or making a work order request, please check the below possible options:
Step 1: Check that a fuse hasn’t blown or that the circuit breaker hasn’t tripped. Replace with the appropriate fuse or reset the circuit breaker.
Step 2: Check that your thermostat is on, heat is selected, and set at a temperature that would call for heat (not too low)
Step 3: Check that there is nothing obstructing the airflow from the heater or heater vents.
Step 4: Electric furnaces, not baseboards or cadet heaters, often have a light switch right next to the furnace which turns the furnace off. Because this switch is identical to a light switch, it gets turned off by mistake. Simply check any nearby switches. If they don’t turn lights on and off, they may be turning the furnace on or off.
If after checking the above and you still do not have heat, please submit an on-line maintenance request (work-order). Within the request, please annotate the condition of your furnace filters and the status of any steady or blinking red lights.
No heat from system using gas heat
Submit a work order immediately to sovereignrm.com annotating all observations about the problem.
Before submitting a work order request, if you are able, please check the below possibilities:
- Check that a fuse hasn’t blown or that the circuit breaker hasn’t tripped. Replace with the appropriate fuse or reset the circuit breaker.
- In or around most furnaces there is what looks like a light switch. This operates the power to the furnace. Be sure this switch is on before completing the on-line maintenance request. You will be charged for the heating company to flip this switch.
- Check that your thermostat is on; heat is selected, and is set at a temperature that would call for heat (not too low).
- Verify that your gas service is in your name or has not been disconnected for non-payment or other issues.
- Can you hear any fans or blower running? If no noise at all, the problem must be one of the items above.
- Is there a window with a blinking or steady red light? If so, please explain what you are seeing if you submit a work order request.
- Are your furnace filters dirty? If so, replace immediately. Dirty filters are the cause of 95% of all heating issues. If your lease requires you to maintain your furnace filters and you submit a request for maintenance and your filters are found to be dirty, you likely will be billed for all charges. To avoid inconveniences of not having A/C or no heat, keep spare filters handy and replace them at a minimum of once every three months.
If after checking the above and you still do not have heat, please submit an on-line maintenance request. Within the request, please annotate the condition of your furnace filters and the status of any steady or blinking red lights.
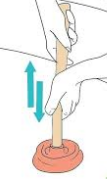 Common household drains that clog:
-
- Kitchen sink
- Bathroom sink
- Bath tub
- Shower
- Toilet (commode)
Kitchen Sink Clog
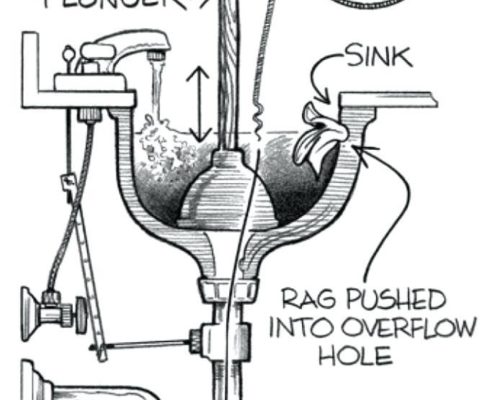 When there is a disposal installed, follow the unclog process in item 4, to unclog.
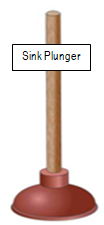
When there is no disposal unit, you may unclog a kitchen sink with a plunger (one set aside for kitchen use). Put on a pair of rubber gloves.
Step 1: Fill the sink halfway with hot water.
Step 2: Plug the overflow hole with a rag.
Step 3: Position the plunger over the drain, then work the plunger up and down until the water starts flowing out the drain.
If you don’t have a plunger on hand, you can also unclog your kitchen sink with vinegar and baking soda. To do so:
Step 1: Bail out any water that’s currently in the sink, and then
Step 2: Push 1 cup (128 g) of baking soda down the drain (use a spatula)
Step 3: Pour 1 cup (240 mL) of vinegar into the drain
Step 4: Put the stopper into the sink so that the vinegar is forced toward the clog
Step 5: Let sit for 5 minutes
If your sink is still clogged:
Pour four cups of boiling water in the drain. Run water from the faucet. If drain is still clogged, repeat the plunger process, then the baking soda and vinegar, if necessary.
If the sink is still clogged, and you are not capable of using a cable auger, or do not have one, submit a work order in the system, notating what you have done, to no avail.
Watch this video: https://www.youtube.com/watch?v=r25zMpTPotA
Bathroom Sink Clog
Usually the clog is caused by hair and gummy soap scum that get caught on the stopper or pivot rod and clogs the drain. Slow-moving or stopped-up drains are common in bathroom sinks.
The good news is that you can clear it yourself, easily.
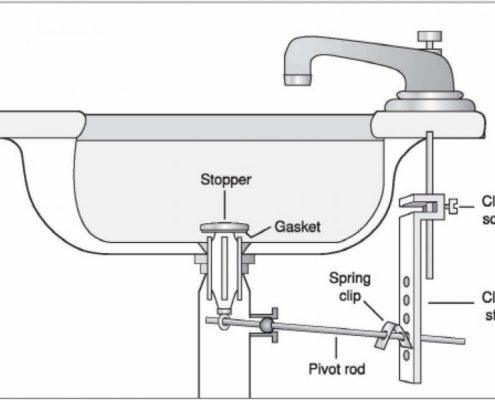 Avoid using chemicals
Step 1: Put on rubber gloves
Step 2: Unscrew the cap from the pop-up stopper and pull the stopper straight out of the drain.
Step 3: Remove the hair and soap scum that is attached. Discard removed material in waste bin.
Step 4: Hold stopper over the waste container, clean the pop-up stopper with warm soapy water.
Step 5: Run hot water in sink to ensure that is no longer a clog.
Step 6: If there is still a clog, take a regular wire coat hanger and straighten it out as best you can. Then, bend one end over to create a small hook. Push it into the drain and start fishing. You should be able to get any remaining hair and scummy stuff out of the drain. Remember, you always want to be pulling gunk out, not pushing it further in. When you’ve got as much out as you can, run the hot water, and it should clear things up nicely.
Watch YouTube video: https://www.youtube.com/watch?v=qG9KQlRZFWE
Item 7: If water is still not running smoothly, use plunger process, similar to plunging the kitchen sink clog. Still no result, submit a maintenance request (work order).
Unclog my Bathtub
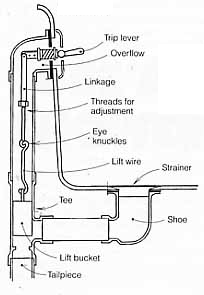
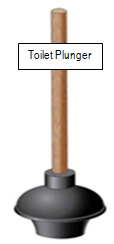
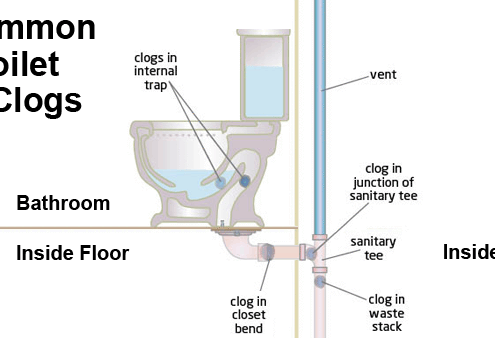
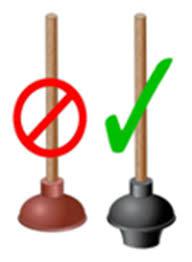
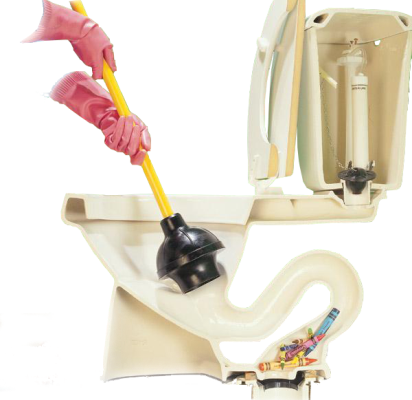
Unclog my Toilet (Commode)
https://www.artofmanliness.com/articles/how-to-unclog-a-toilet/
   |
|
|
|
|
|
|
|
Troubleshooting your dishwasher
In each case, if you are not able to perform any of the checks and corrections, submit a work order immediately to sovereignrm.com annotating all observations about the problem.
|
Symptom |
Possible Solutions |
| Dishwasher does not work – no sound, water or lights |
|
| Dishwasher does not start but motor hums |
|
| Dishwasher does not fill with water or it drains while filling |
|
| Water does not drain from the dishwasher |
|
| Dishwasher is leaking water or soap leaks around the door |
|
| Dishwashers not cleaning properly |
|
| Door does not close or latch properly |
|
| Dishwasher cycle does not complete |
|
| Detergent cup does not open |
|
| Dishwasher is foaming soap suds |
|
How to turn off main water supply
Important – identify where the water shut-off valve is located before there is a water leak emergency.
Watch this you tube video: https://www.youtube.com/watch?v=RvE6n7rTGnM
| Symptom |
Possible Solutions |
| Water leaks in the house. |
|
| Water running down and through the walls and/or ceiling. |
|
Important – If at any time you are unable to DIY Submit a work order to sovereignrm.com
| FAQ’s – Frequently Asked Questions |
Suggested Answers |
|
| What is a Smoke Detector/Alarm | 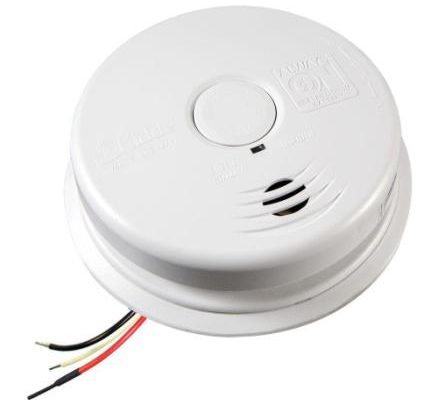 A smoke detector (alarm) is a fire-protection device that automatically detects and gives a warning of the presence of smoke. A smoke detector (alarm) is a fire-protection device that automatically detects and gives a warning of the presence of smoke. |
|
| Why do I need smoke alarm in my residence |
|
|
| What do I need to know |
|
|
| I hear beep/chirp approximately 2-3 times every 5 minutes |
|
|
| I hear beep/chirp non-stop |
|
|
| More about false alarms |
|
|
How do I test my fire alarm or smoke detector?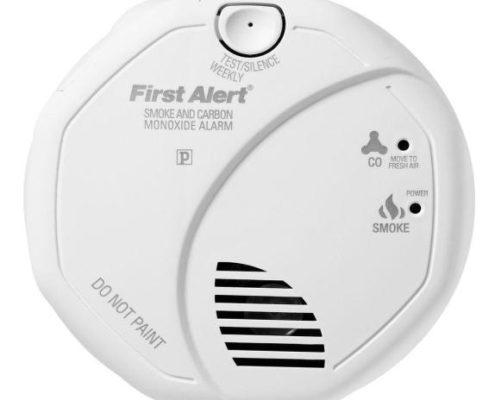 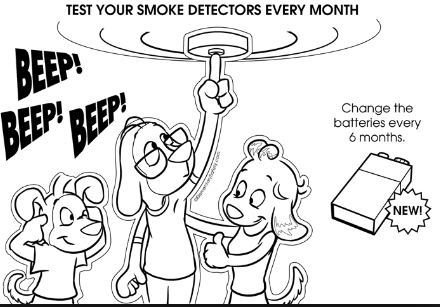 |
See more images and tips at
https://elementarysafety.com/colouring-section/coloring-fire-safety You should always check the manufacturer’s instructions for the proper method of testing your smoke detector and fire alarm. But, in general, the United States Fire Administration (USFA) states that most battery-powered and hardwired smoke detectors can be tested in the following way: Step 1: Alert family members that you will be testing the alarm. Smoke detectors have a high-pitched alarm that may frighten small children, so you’ll want to let everyone know you plan to test the alarms to help avoid scaring anyone. Step 2: Station a family member at the furthest point away from the alarm in your home. This can be critical to help make sure the alarm can be heard everywhere in your home. You may want to install extra detectors in areas where the alarm’s sound is low, muffled or weak. Step 3: Press and hold the test button on the smoke detector. It can take a few seconds to begin, but a loud, ear-piercing siren should emanate from the smoke detector while the button is pressed. |
|
| If the sound is weak or nonexistent |
|
|
| If it has been more than six months since you last replaced the battery (whether your detector is battery-powered or hardwired) |
|
|
| My clothes are still wet! | Check the dryer selection settings for the type clothes, and run again. Still not dry, open this website: https://www.familyhandyman.com/appliance-repair/washer-and-dryer-repair/clothes-dryer-repair-guide/view-all/ |
| You could also have a dryer exhaust venting issue. | Vent may be clogged – You my review this web |
| Note that
If you purchased your own appliance, |
Ensure that you procured the warranty, as such call your warranty service personnel. |
| Note That
If you rented with the appliances, please |
submit a work order to https://www.sovereignrm.com/tenants/maintenance-request/ |
Whether you’ve got a traditional top-loading washing machine or a more contemporary front-loading design, even the most dependable appliances will suffer from problems after years of use. Instead of contacting a repair center as soon as a problem occurs, many issues can be resolved with just a little know-how and some common household tools. Below is a short list of the most common washing machine issues that many residents may encounter.
Again, before attempting any repairs on a home appliance, it’s important to unplug the device and wear the appropriate safety attire for the job at hand.
| Washing machine will not start or move on to the next cycle, even though there’s power supplied to the machine | Check if there is a broken or faulty lid switch, turn off power to the machine and replace if you can, if not
|
| Washer wobbling or excessively loud vibration. |
|
| Inaccurate water levels and inconsistent water temperatures | Problems with the inlet water connections behind your washing machine.
|
My fridge is not working correctly |
First please –
|
| Runs Constantly | It tries to cool but cannot get the job done
Generally speaking, a refrigerator will run more frequently when it is –
|
| Fridge not cold or too hot |
|
| Fridge smells bad (stinky) |
|
| Fridge makes unusual, continuous (noisy) sound |
|
| Fridge leaks | If the refrigerator is leaking water it’s possible that the
Additionally –
|
| Door not closing or sealing properly |
|
| Light stays on | Check the door for proper fit and that nothing is obstructing its closing. Still on, then light switch may be defective. Contact your fridge service warranty or if you rented with the fridge included: submit work order at https://www.sovereignrm.com/tenants/maintenance-request/ |
| Does not defrost | Defrost heater or thermostat may be defective http://bestfridgereview.com/why-your-fridge-is-not-defrosting/ Contact your fridge service warranty or if you rented with the fridge included: submit work order at Sovereignrm.com |
| https://www.familyhandyman.com/appliance-repair/refrigerator-repair/fix-refrigerator-problems/view-all/ | |
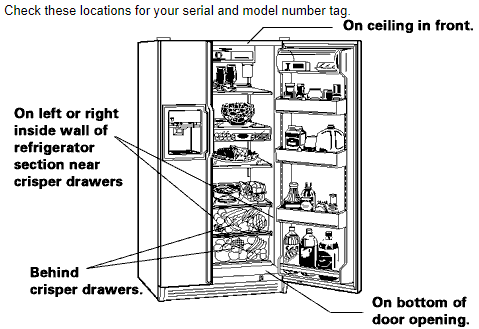
| How do I find the model and serial # of my refrigerator? |
|
 |
|
| Automatic garage door will not open or close |
|
| The garage door opens normally but doesn’t make any attempt to close when the remote is pressed |
|
| The garage door is only partially closing |
|
| The track is not aligned properly |
|
| Your springs are broken |
|

